Digital Receipt
Frequently Asked Questions
General
How can I activate the Digital Receipt for my company?
To use Digital Receipts, the feature must first be enabled in the efsta Portal.
If the feature is not activated, digital receipts will not be available, even if all other settings are configured correctly.
Activation is carried out by your efsta partner manager, therefore it cannot be enabled directly by the customer in the system.
How is a transaction connected to a customer's account?
To assign a customer number to an efsta Wallet user, certain requirements must be met in the POS system, the EFR data, and the efsta Wallet app.
This ensures that digital receipts are correctly delivered and that customers can link their account. Both values must be provided correctly when sending transaction data to the EFR.
- ESR.XID→ Used to identify the recipient and ensure that the receipt is delivered to the correct end customer
- ESR.Ctm.CN→ Used to assign the customer number to the efsta Wallet account of the voucher recipient
For the process to work properly, the POS system must:
- support the entry of customer numbers
- send the customer number during the transaction
Even if the customer number is transmitted correctly, the end customer must still confirm the assignment.
Process for Customer Number Assignment
The process works as follows:
- The customer opens a digital receipt in the efsta Wallet app
- The app recognizes the customer number
- The user is prompted to add the customer number
- The user confirms the assignment
Only after this confirmation is the customer number linked to the Wallet account.
What are the efsta Wallet and Digital Receipt?
efsta Wallet
is a mobile application designed for end customers to manage customer cards and primarily store digital receipts.
This enables customers to keep all their receipts n a structured and convenient way in one place and access them anytime via their mobile device.
efsta Digital Receipt
is the digital version of a traditional receipt, provided in electronic form.
Instead of receiving a paper receipt, customers can access their receipt digitally via the efsta Wallet,
Simple Bill
is a layout and display option for digital receipts within the efsta system.
- is available starting from EFR software version 1.8.4
- can be tested using any test EFR connected to the efsta Cloud
- provides a basic and structured receipt layout
It is designed for straightforward use cases where a simple and clear display is sufficient.
Smart Bill
is an enhanced version of the digital receipt with additional features and an upgraded layout.
- an improved visual layout
- additional features and functionality
- a more advanced user experience for viewing receipts
It is designed to provide a richer and more flexible way to present digital receipts.
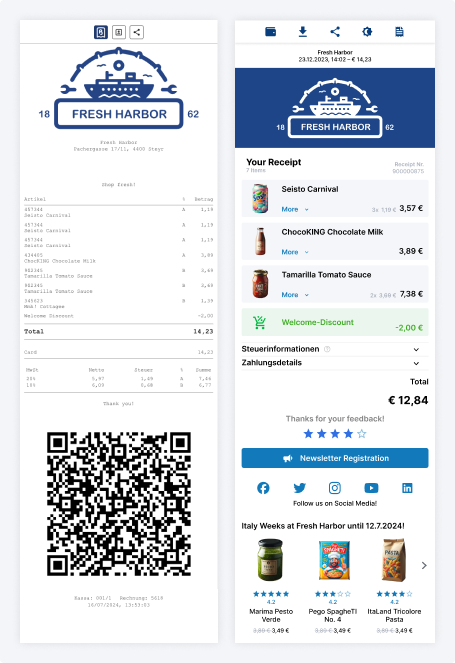
Simple Bill Smart Bill
Digital Receipt Management
Do I need to configure the design in the management at all?
The design configuration in Bill Management affects how your company is displayed in the efsta Wallet app and how receipts from your company are presented to end customers.
While configuring the design is not mandatory, it is strongly recommended to ensure a professional, clear, and recognizable appearance.
How Company Design Settings Affect Customers
The company settings in Bill Management influence both:
- the visual representation of your company in the efsta Wallet app, and
- the general behavior and identification of receipts issued by this company.
These settings help customers quickly recognize receipts and associate them with the correct company.
Display name configuration
If no display name is configured in Bill Management, the system automatically uses the company name stored in the efsta Portal.
This works technically, but it may not always be ideal from a customer perspective—especially if the legal company name:
- is very long, or
- includes legal suffixes such as GmbH or KG.
For this reason, configuring a display name is recommended.
The display name:
- does not need to match the legal company name
- can be shortened or simplified
- is optimized for better readability in the efsta Wallet app
This allows a cleaner and more customer‑friendly labeling.
Logo configuration
The same principle applies to the company logo.
If no logo is configured, the efsta Wallet app displays a placeholder icon (question mark) instead. While receipts are still shown correctly, the lack of a logo reduces brand recognition and makes the receipt appear less professional.
Uploading a logo is therefore recommended to:
- clearly identify your company
- improve trust and recognition for end customers
- properly represent your brand in the Wallet app
Configuring the design in Bill Management is optional, but setting a display name and logo is highly recommended. These small adjustments significantly improve clarity, branding, and the overall customer experience when viewing receipts.
How can I customize the layout?
Introduction
The bill layout can be adjusted directly in the Bill Management UI. This allows you to customize the appearance of your bills, such as logos or layout sections, without external tools.
Access to the layout configuration must be activated by an efsta employee before it becomes available.
Step-by-step instructions
1. Open Bill Management
- Select the relevant company
2. Navigate to the layout configuration
- Go to Simple Bill Layout or
- Go to Smart Bill Layout
The available options depend on the selected layout type.
3. Understand the layout structure
- The bill document is divided into several sections
- Each section:
- represents a specific area of the document
- has its own configuration and customization options
The Simple Bill and Smart Bill layout designers are structured similarly, but the available features may differ.
4. Customize the layout
- Adjust the required sections as needed
- Possible examples:
- Change logos
- Modify visual elements
- Adapt layout settings
5. Save your changes
- Changes can be:
- saved immediately, or
- saved for a predefined time period
This allows temporary changes, for example:
- using a different logo during Pride Month
If the layout configuration is not visible, it has not yet been activated. Please contact efsta Support to request activation if required.
How do I add a company logo?
Adding a company logo in Bill Management ensures that your brand is clearly visible in the efsta Wallet app and on receipts.
If no logo is configured, a placeholder icon (question mark) is displayed instead.
To add a company logo, follow these steps:
- Open the Management UI
- Open your company
- Navigate to the field “Company logo”
- Select the desired image file (JPG or PNG)
- Save your changes
After saving, the logo is uploaded to the efsta server and applied automatically.
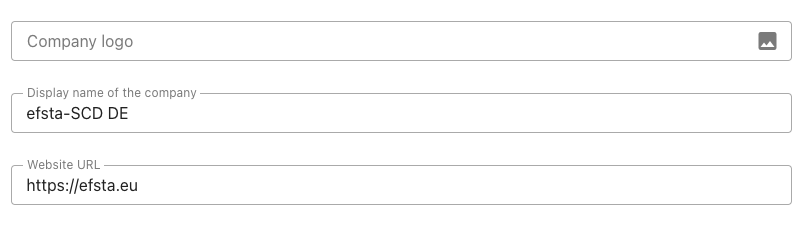
Image requirements and recommendations
For best results, your logo should meet the following criteria:
- Use a square format
- Recommended resolution: approx. 400 × 400 pixels
- Maximum file size: 500 KB
Keeping the file size small ensures fast loading times on end devices.
The logo should also be designed so that it is clearly visible in both:
- light mode (white background) and
- dark mode (black background)
This can be achieved, for example, by using:
- backgrounds, or
- outlines
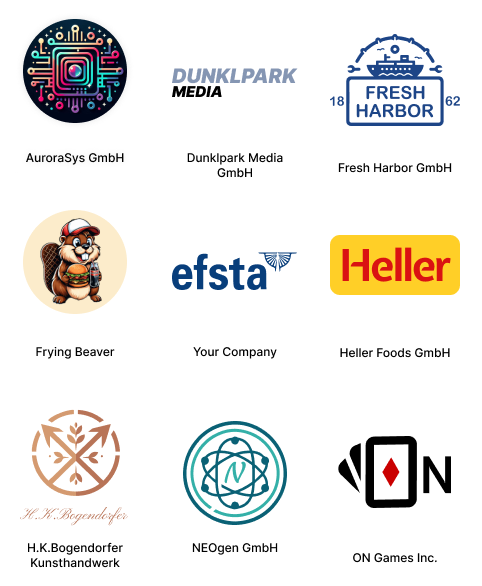
Please consider the following when uploading a logo:
- You must have the necessary rights to use the image
- This is especially important when using images from external sources or URLs
- It is not allowed to use images with:
- pornographic content
- offensive or inappropriate content
If no company logo is uploaded, the efsta Wallet app will display a placeholder icon (question mark) instead.
To ensure a professional and recognizable appearance, adding a logo is strongly recommended.